Changing the Background
Next, we’ll change the imagery that WWT is displaying. Edit the JavaScript code
of your index.html file to read as follows:
var script_interface, wwt;

function init_wwt() {
    const builder = new wwtlib.WWTControlBuilder("wwtcanvas");
    builder.startRenderLoop(true);
    script_interface = builder.create();
    script_interface.add_ready(on_ready);
}

function on_ready() {
    console.log("WWT is ready!");
    wwt = wwtlib.WWTControl.singleton;
    script_interface.add_arrived(on_arrived);
    wwt.gotoRADecZoom(17.75, -28.9, 10, false);
}

function on_arrived() {
    wwt.setBackgroundImageByName("PanSTARRS");
}

window.addEventListener("load", init_wwt);
We now use ScriptInterface.add_arrived() to add a callback that will be invoked when the slew of the view completes. That callback will in turn use WWTControl.setBackgroundImageByName() to change the background image to a mosaic of PanSTARRS 3pi.
In other models you might use
WWTInstance.setBackgroundImageByName()
or
engineStore().setBackgroundImageByName()
.
Instead of worrying about an add_arrived() callback, you’d use async
code to deal with sequencing actions.
Tiling In Data🔗
If you reload your app, you will probably notice a very gross and jarring flash as the background imagery switches from the WWT default (a DSS2 mosaic) to PanSTARRS. This is, to a certain extent, an intentional part of this tutorial. WWT loads data on the fly, so when you ask it to display new imagery, there will be a period when the new data are “tiling in” — being downloaded by the browser.
There’s simply no way to avoid this. To achieve a really high-end experience,
you need to design your code around this reality. If you’re going to change
background images, for instance, try to do it when zoomed as far out as
possible. (As an experiment, try reloading your app with the gotoRADecZoom()
zoom setting changed from 10 to 360.) Prefer non-instant gotoRADecZoom() slews
to give the engine more time to fetch data as it pans to the new target. (As
another experiment, try setting the “instant” option to true and commenting
out the change to the PanSTARRS background — the effect is also be a bit
jarring.)
Built-In Imagery🔗
You might very well ask: “How does WWT know what Pan-STARRS is?” Good question!
One of the great things about WWT is that its data model is very extensible — you can pull in data from lots of different sources, and there are hardly any “privileged” data assets that get special treatment.
That being said, by default WWT does come preloaded with a core corpus of imagery and other data sets. That core corpus is loaded on startup. It is expressed as a WTML collection that is downloaded from the following URL:
http://worldwidetelescope.org/wwtweb/catalog.aspx?X=ImageSets6
(There are historical reasons for this URL’s particular form.) This collection defines roughly 100 core sky maps that can be loaded by name. Its contents are managed in a GitHub repository called wwt-core-catalogs.
The Render Type🔗
The choice of background imagery has a special role in WWT. Besides controlling the base image that’s displayed, it also controls the engine’s “render type”: the global exploration mode that WWT uses. The WWT WebGL engine supports five such types.
The first is “sky mode”, as we’ve been seeing.
The second is “planet mode”. To experience this, modify your JavaScript code to use a different background and, while we’re at it, zoom level:
function on_ready() {
    console.log("WWT is ready!");
    script_interface.add_arrived(on_arrived);
    wwt = wwtlib.WWTControl.singleton;
    wwt.gotoRADecZoom(17.75, -28.9, 100, false);
}

function on_arrived() {
    wwt.setBackgroundImageByName("Visible Imagery");
}
Suddenly we're looking at Mars!
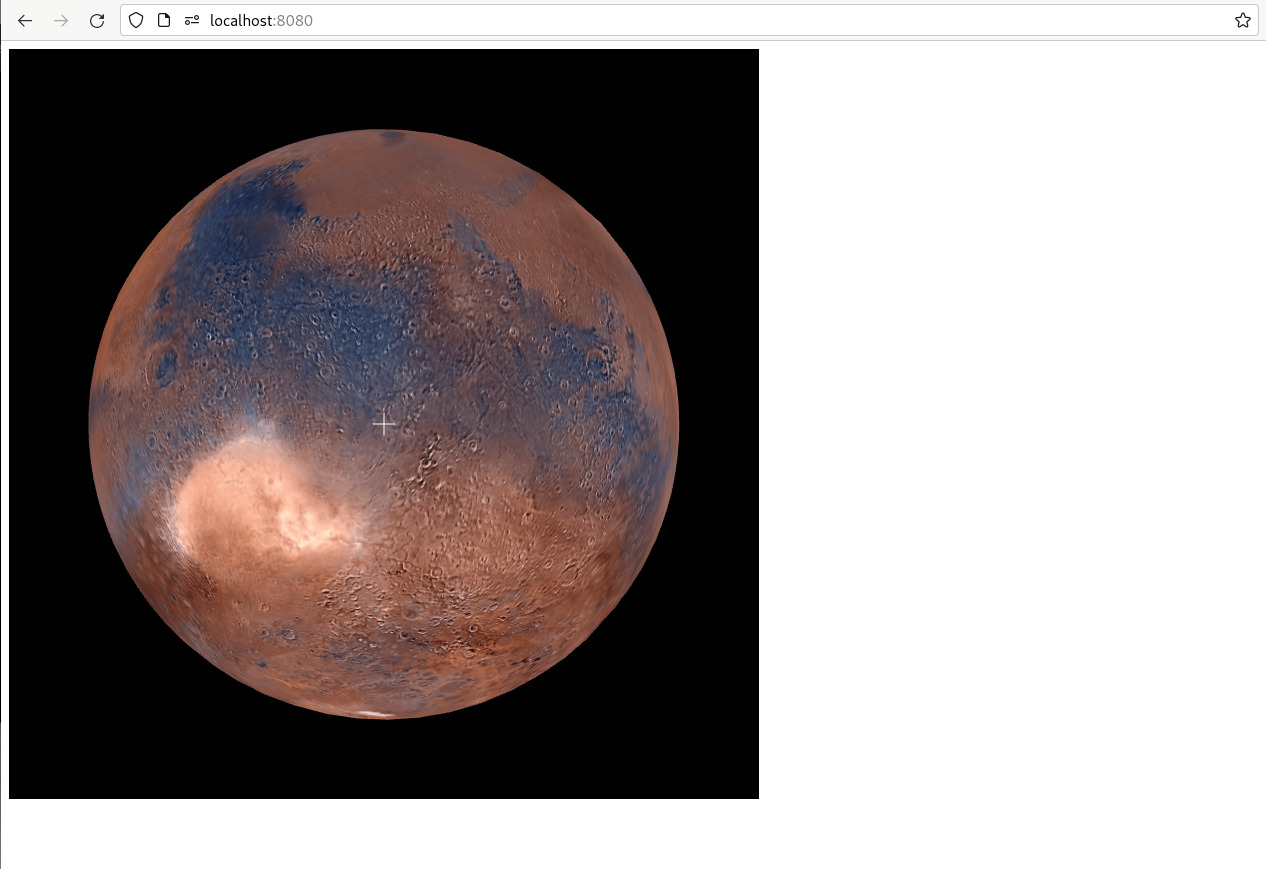
We’ve pulled up WWT’s default Mars map here — to maintain compatibility with old Windows app installations, the map must be named “Visible Imagery”. Setting it as the background causes WWT to enter planet mode, where you can pan and zoom around a sphere from the outside — which isn’t really too different from sky mode, where you’re navigating a sphere from the inside. Take some time to explore Mars — it’s fun!
The third mode is “earth mode”, which for our purposes is the same as planet mode. You can activate it with:
wwt.setBackgroundImageByName("Bing Maps Aerial");
The fourth mode is “panorama” mode, where we go back to the inside of a sphere:
wwt.setBackgroundImageByName("Curiosity 360-Degree View Approaching Mont Mercou");
This is largely the same as “sky mode”, but things like the constellation overlays are suppressed.
The fifth and final mode is special. It is the full-3D solar system mode:
wwt.setBackgroundImageByName("Solar System");
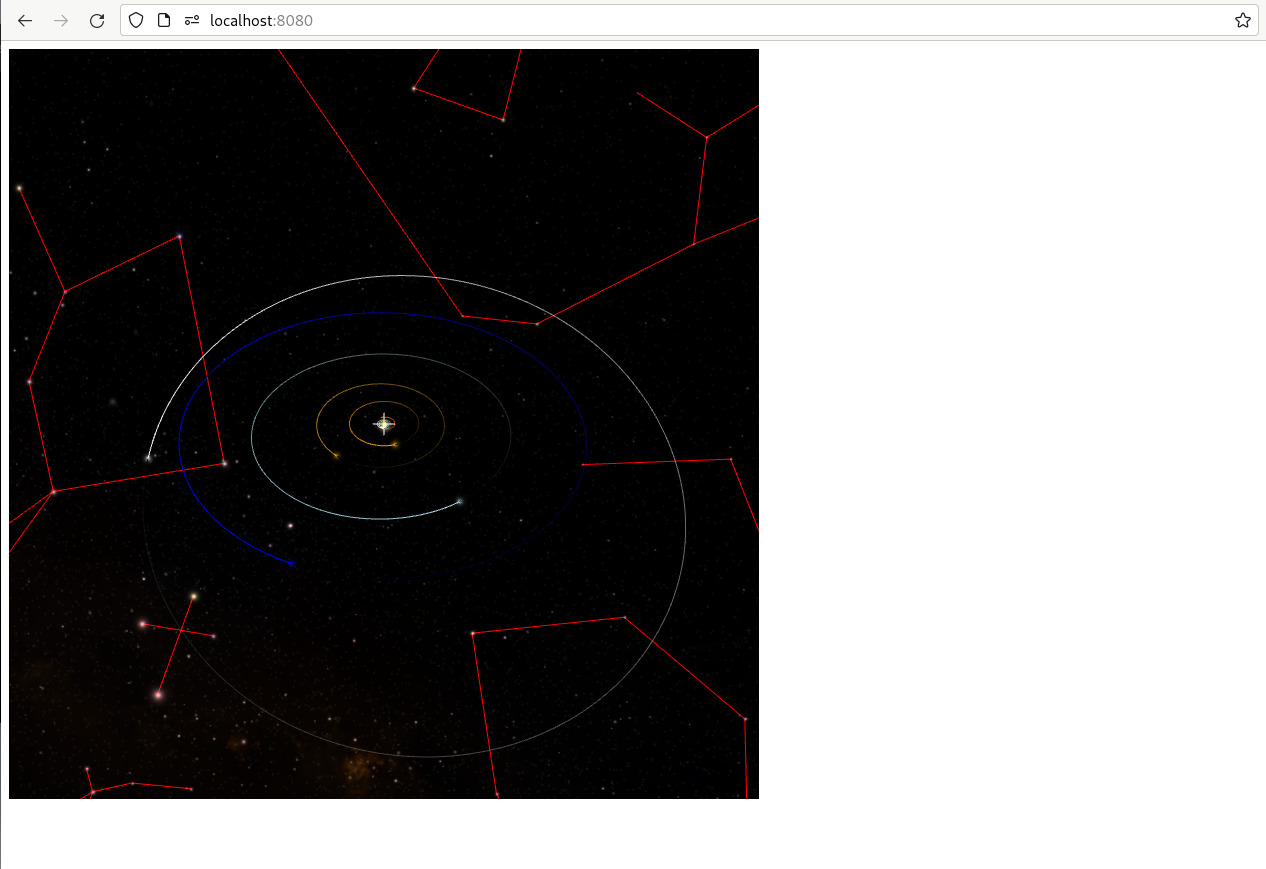
Actually, this mode is 4D — it has good-accuracy built-in ephemerides and you can control its clock, which by default tracks real time. The precise view that you get when you enter this mode will, by default, reflect the actual positions of the planets at the time that you run the app. This mode has a ton of features that we won’t go into just yet.