Satellite and Minor Planet Orbits
WorldWide Telescope (WWT) allows for a variety of bodies in the Solar System to be represented by orbital lines with and by 3D representations (planets or spacecraft models).
- Planets
- Moons
- Asteroids
- Satellites from Two-Line Elements (TLE)
- Minor Planets from Minor Planet Center (MPC)
- User-defined trajectories and orbits
In all these cases the motion is rendered correctly the desired rate of the passage of time showing orbital motions. Below are instructions showing how to input user defined data and data from data sources outside WWT.
Satellites from Two-Line Element set (TLE)🔗
Satellites orbits are often represented in a compressed format called a two-line element set (TLE). Below is an example TLE.
ATLAS CENTAUR 2
1 00694U 63047A   16133.33455413  .00000915  00000-0  10743-3 0  9994
2 00694 30.3557  209.6188 0589210 154.7583 208.3053 14.01718748626428
Line 0 is the name of the object. Lines 1 and 2 contain the orbital information. Information on this format is available on Wikipedia.
TLEs are available from various sources including:
Below are the steps needed to take orbital information from these sites and import them into WWT.
Single TLE as a reference frame🔗
- Start AAS WorldWide Telescope
- Open a web browser and find a website that provides TLEs (e.g., Celestrak's NORAD page) and highlight a single TLE. This can include the Line 0 (name) or not, but must include a single Line 1 & 2.
- In WWT layer manager (list on the left-hand side of the main window), under
Sun, make sure the planets are visible (may need to expand with the “+”
symbol). Then right-click on “Earth” and select “New Reference Frame”.
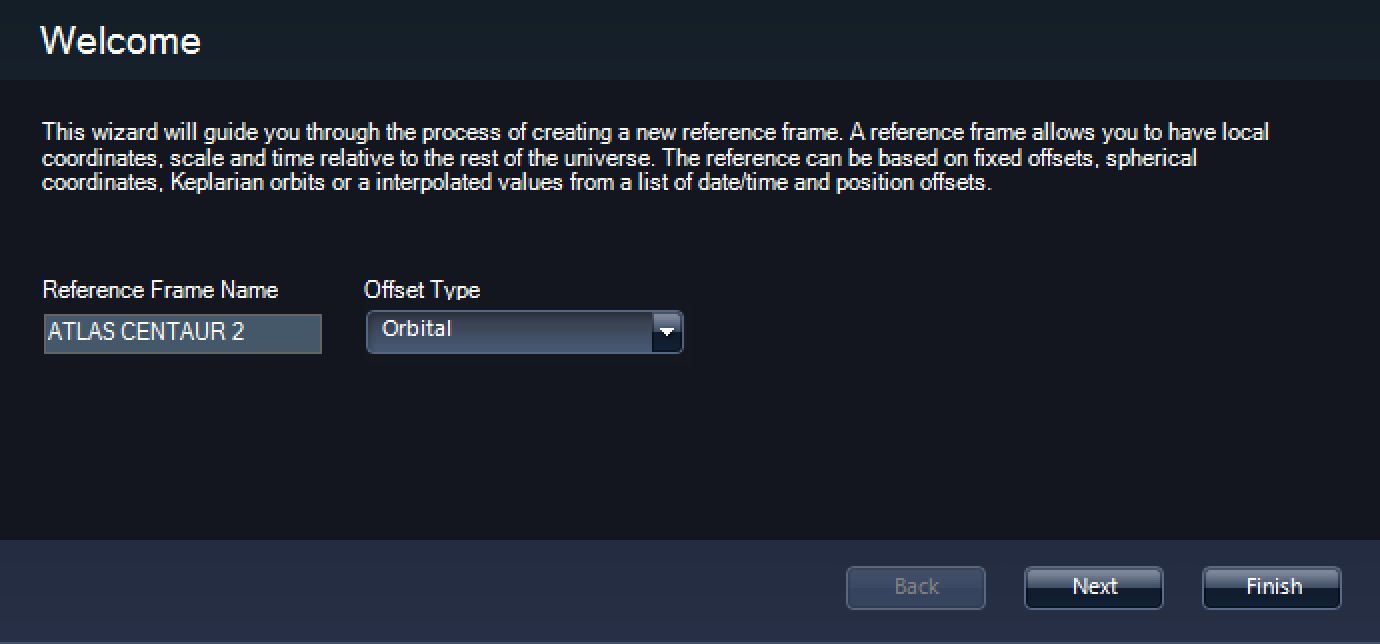
- In the “Welcome” menu, give the new frame a name (e.g., “ATLAS CENTAUR 2”). And under “Offset Type”, select “Orbital”. Click Next.
- In the “General Options” menu, you can probably take the defaults of a
reference frame as a sphere of 1km diameter and not rotational motion. If
needed these can easily be changed later. Click Next.
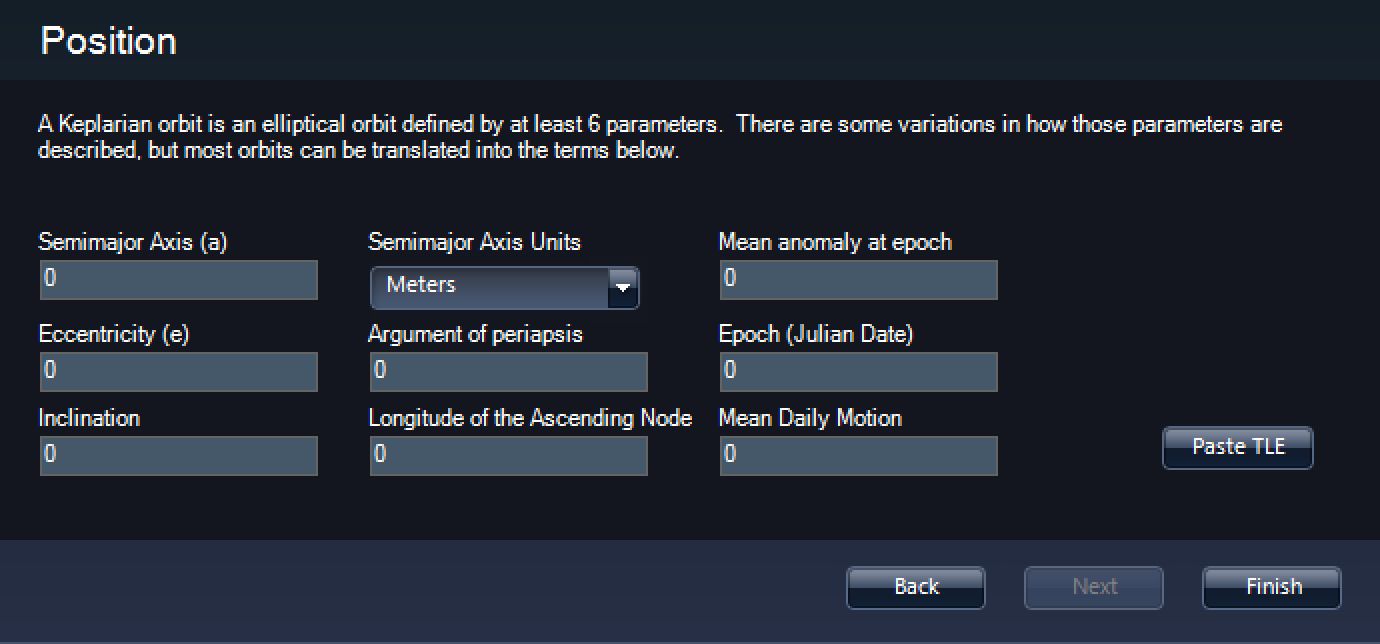
- Make sure the text is properly highlighted (see step 2). Then in the “Position” menu click “Paste TLE”.
- This creates a reference frame that orbits the Earth in the proper orbit. To visualize it you will want to put a 3D model of the object. Right-click on the name of the new reference frame and select “Add”. Then navigate to the location of the 3D model (in OBJ or 3DS format). This will attach the model at the location of the reference frame. This way you can show spacecraft in the proper location and it will move properly as you advance time. More information is available in the 3D Models section.
- If you want to find or see the model you can right-click on the reference frame and select “Track this frame”.
One or more TLEs as orbits🔗
- Start AAS WorldWide Telescope.
- Open a web browser and find a website that provides TLEs (e.g., Celestrak's NORAD page) and highlight one or more TLEs. Open Notepad (or similar plain text editor) and paste the contents into the file.
- In WWT layer manager (list on the left-hand side of the main window), under Sun, make sure the planets are visible (may need to expand with the “+” symbol). Then right-click on “Earth” and select “Add”.
- Navigate to and select the desired TLE file.
- It will be shown under the TLE file name under the “Earth” object.
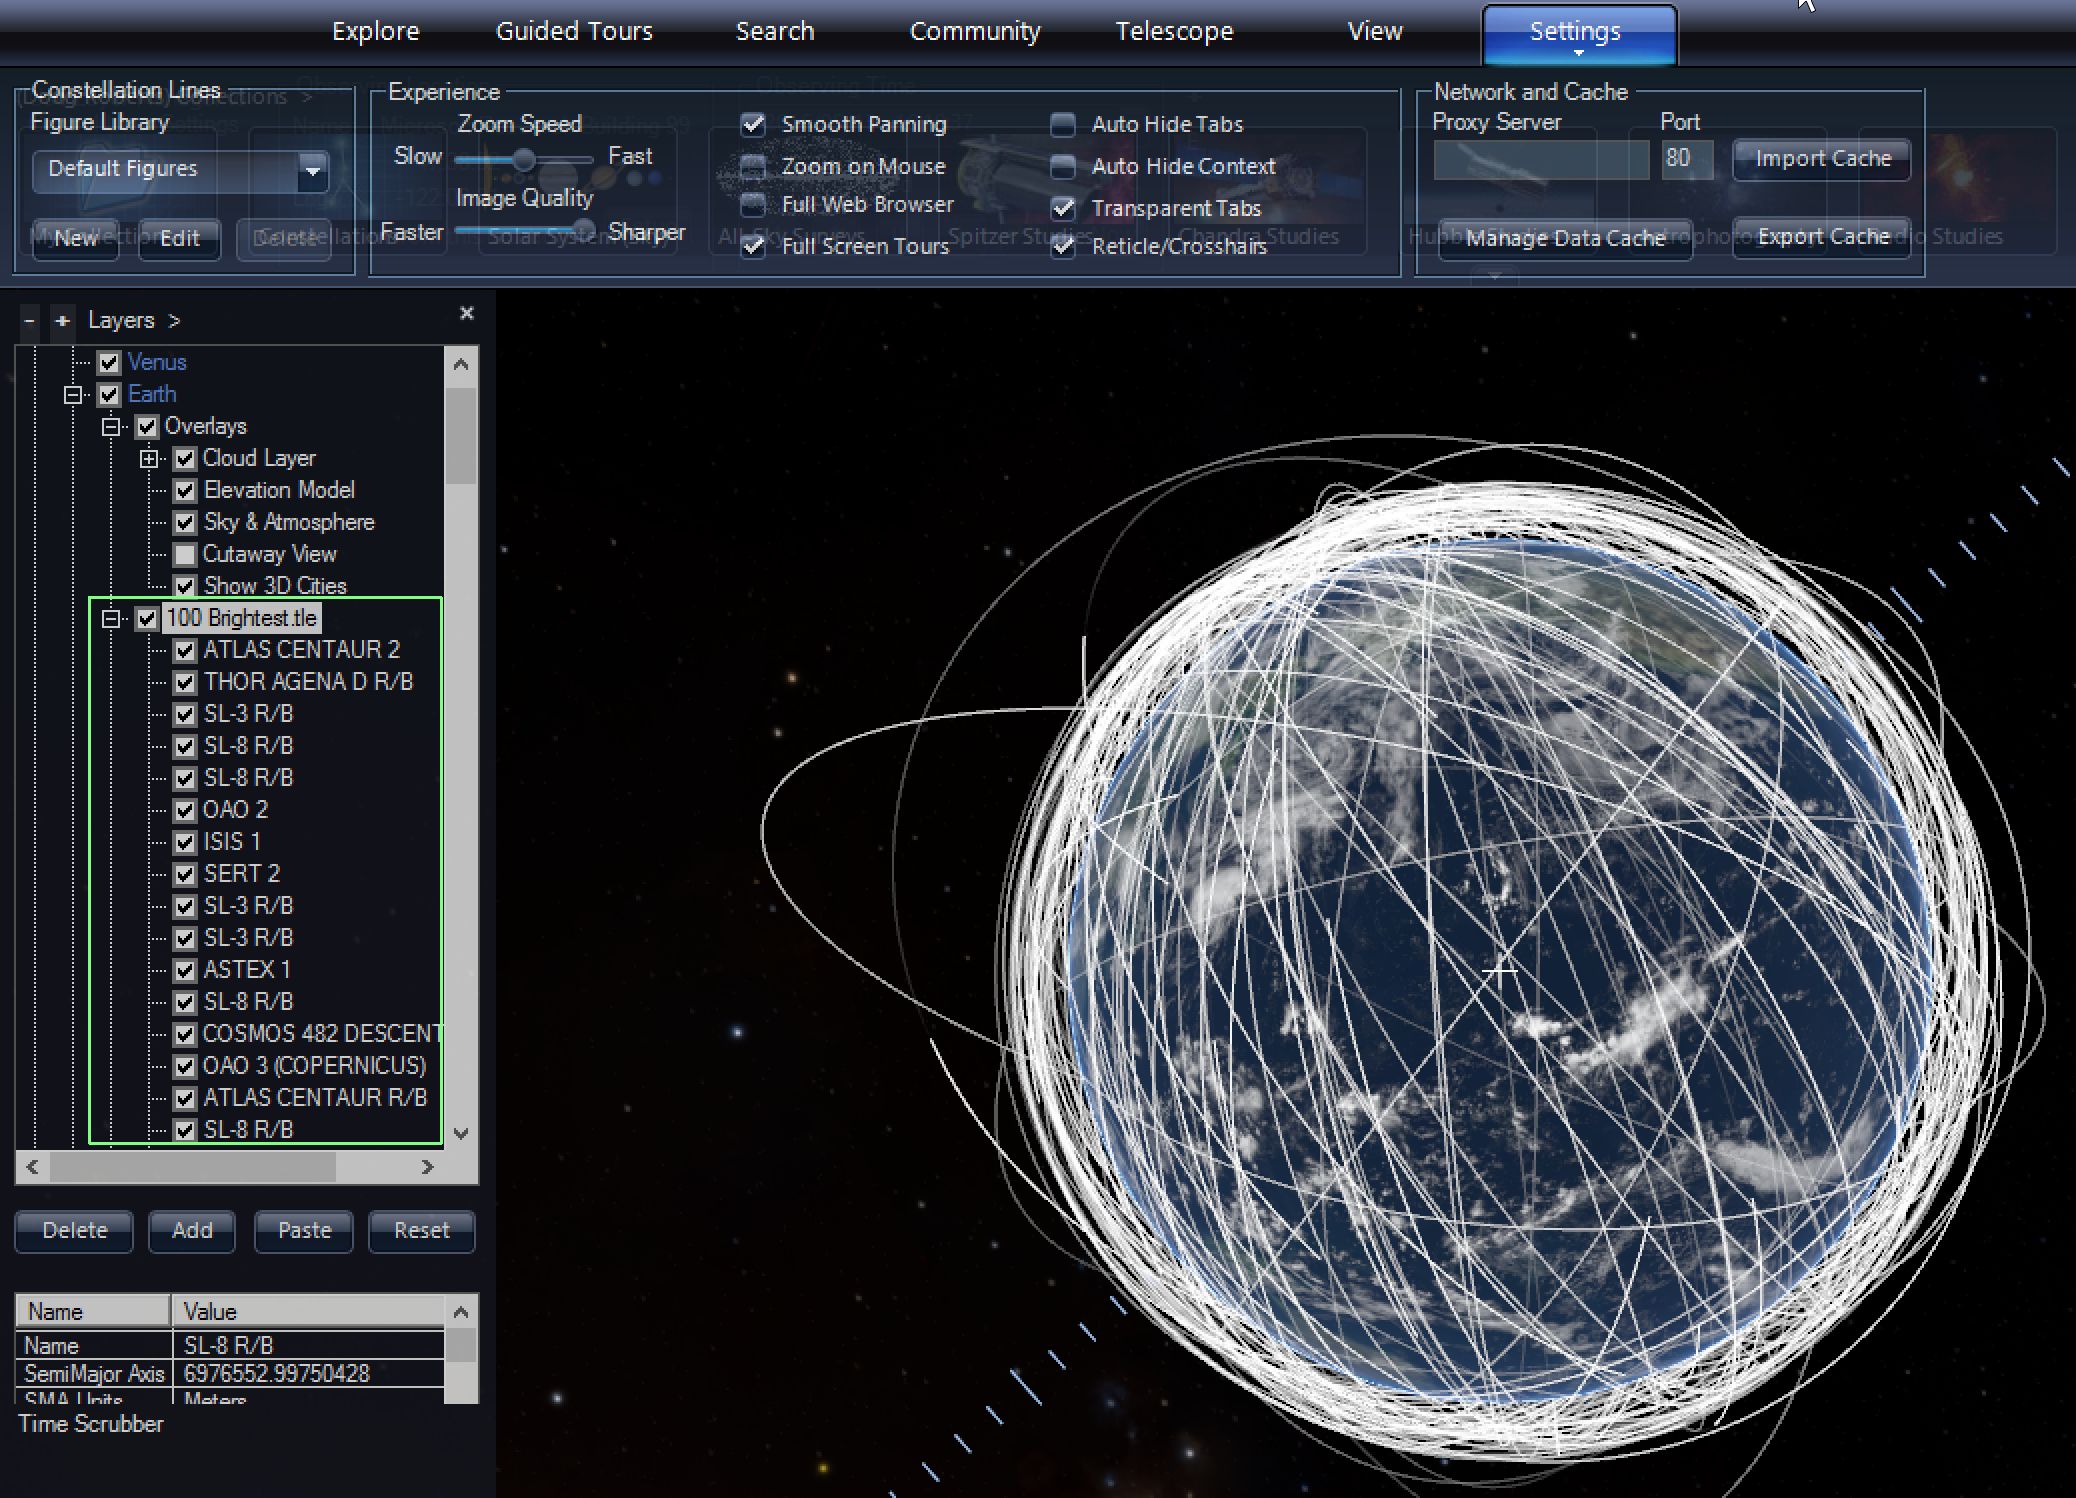
- You can right-click on the TLE file name and select “Expand” to show all
member objects with TLEs in the file. You can uncheck any object you don’t
want shown.
- Note, the TLE file (filtered by the named object selection) can be added to the timeline for keyframe
- You can advance time on the time slider to show the satellites in motion.
Minor Planets from Minor Planet Center (MPC)🔗
Like TLEs, you can add minor planets as either a reference frame or an orbit line.
- Minor Planets as reference frames can be used if you want to bring in a 3D model of the object or represent it as a coordinate grid. Orbit lines are also shown when viewed at a distance. Showing orbit lines for reference frames also requires that in the layer manager under “3d Solar System” that “Moon & Satellite Orbits” is checked. However, if you want to add a minor planet as reference frame to the timeline, you cannot control the fading in and out of the associated orbit lines.
- Minor Planets as orbit lines do not show a dot at the location of the body. The orbit line is brightest at the location of the object and fades as it gets more distant so you can see its location at a distance for large scale motion. These can be added to the timeline editor and can be controlled for opacity (fade-in and out).
Minor Planets as reference frames🔗
- Start AAS WorldWide Telescope.
- In WWT layer manager (list on the left-hand side of the main window), under
Sun, make sure the planets are visible (may need to expand with the “+”
symbol). Then right-click on “Earth” and select “Add”.
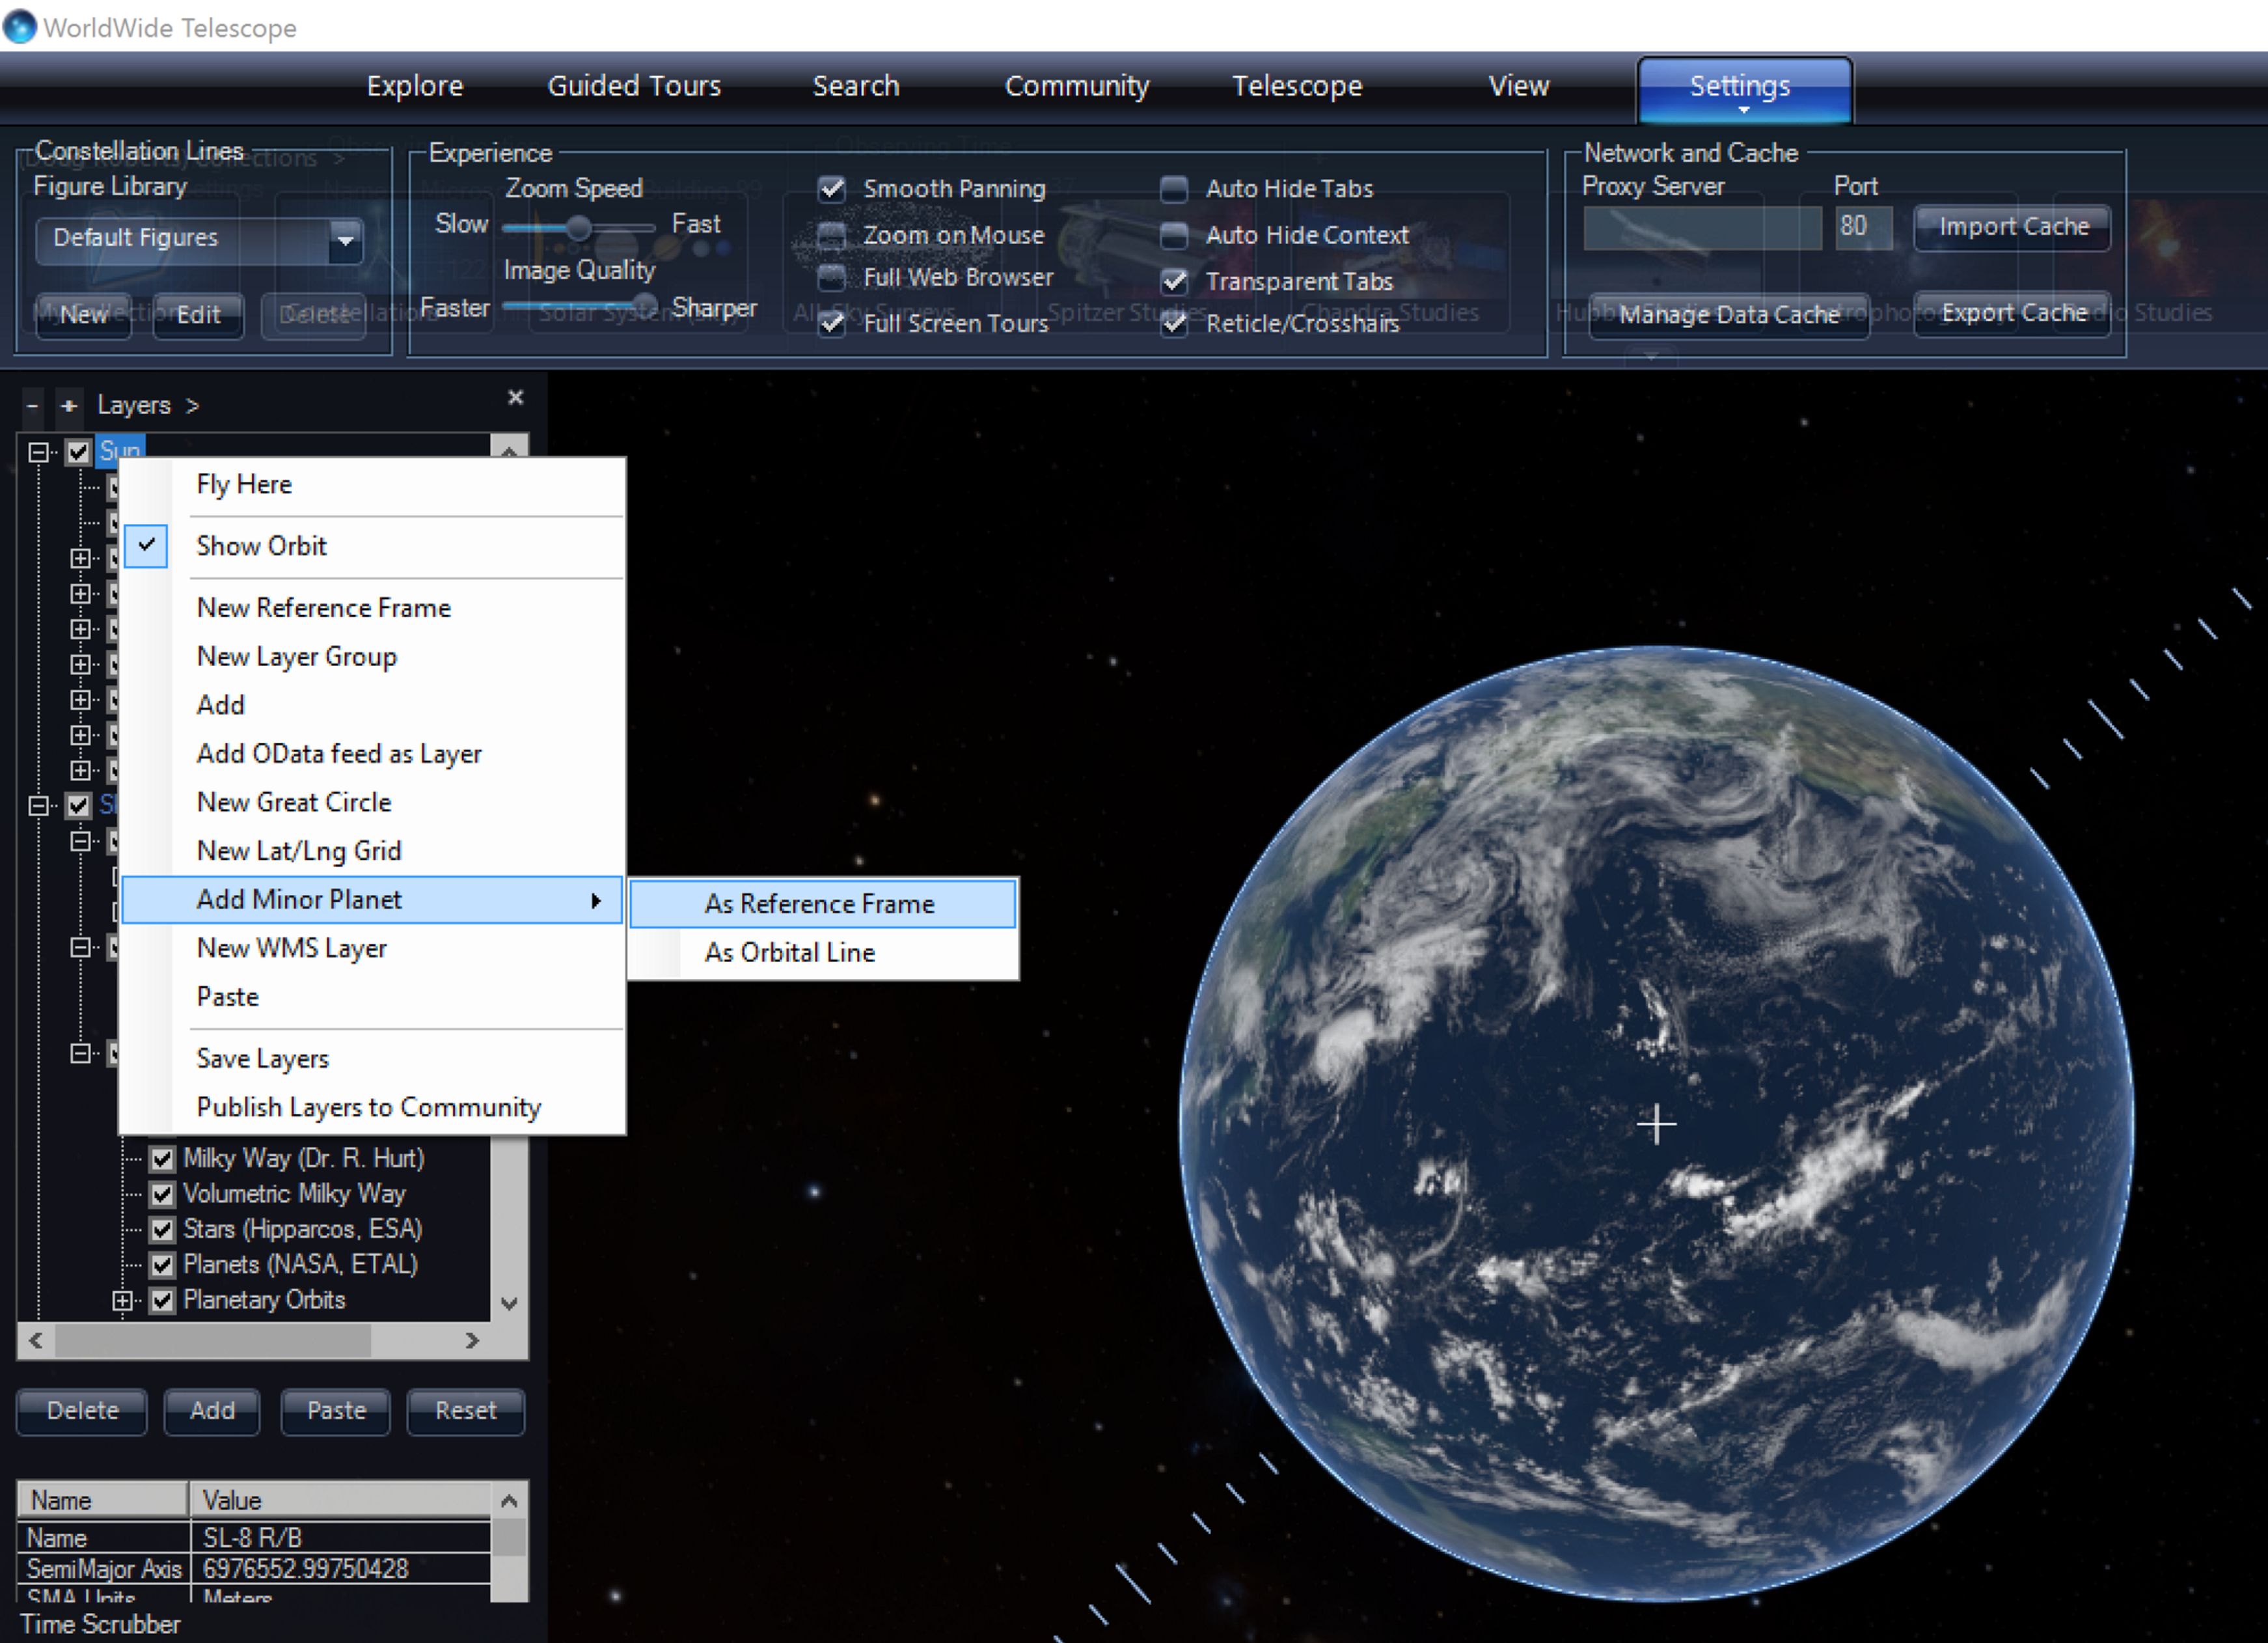
- Select “As Reference Frame”.
- Then in the dialog box enter the exact name of the minor planet. More information on names is available from the MPC.
- This will create a reference frame with the name of the object. It is shown as a dot as well as an orbit line (assuming “Moon & Satellite Orbits” is checked in the “3d Solar System” in the layer manager). You can attach a 3D model of the object as well.
Minor Planets as orbit lines🔗
- Start AAS WorldWide Telescope.
- In WWT layer manager (list on the left-hand side of the main window), under Sun, make sure the planets are visible (may need to expand with the “+” symbol). Then right-click on “Earth” and select “Add”.
- Select “As Orbit Line”.
- Then in the dialog box enter the exact name of the minor planet. More information on names is available from the MPC.
- This will create an orbit line with the name of the object. It is shown as an orbit line (no dot at the position). Unlike a reference frame, you cannot include any 3D model of the object.
User-defined trajectories and orbits🔗
You can add a reference frame to WWT. All reference frames need to be attached to another frame. This concept of nested reference frames is what allows WWT to represent data at scales from inches to parsecs.
- Start AAS WorldWide Telescope.
- In WWT layer manager (list on the left-hand side of the main window), select the object you wish to nest the user-supplied reference frame to. For instance, if you want to place a 3D object on the surface of the Earth, right-click on “Earth” and select “New Reference Frame”.
- In the “Welcome” menu, give the new frame a name (e.g., “My Reference Frame”).
- Choices for “Offset Type”
- Fixed Spherical. This puts a reference frame at a specific latitude and longitude and altitude on the parent body. This is used for instance to put a 3D model of an observatory on the surface of the Earth.
- Orbital. This allows you to enter orbital information describing the motion of an object such as a satellite, see section above: single TLE as a reference frame. You either need to provide orbital elements separately (e.g., semimajor axis, eccentricity etc.) or you can paste in a two-line element set (see above)
- Trajectory. You can add trajectories for spacecraft relative to a reference frame. The trajectories are a list of X, Y, Z locations as a function of time.
- Synodic
- This creates a reference frame that orbits the parent body in the proper orbit. To visualize it you will want to put a 3D model of the object. Right-click on the name of the new reference frame and select “Add”. Then navigate to the location of the 3D model (in OBJ or 3DS format). This will attach the model at the location of the reference frame. This way you can show spacecraft in the proper location and it will move properly as you advance time. More information is available in the 3D Models section.
- If you want to find or see the model you can right-click on the reference frame and select “Track this frame”.