Rendering To Video
You can use WWT to create still frames that can be encoded into a video. Note that WWT writes out a sequence of frames and does not do the encoding to video. You will have to use another solution to create the video and include any audio. Some suggestions are given below. Rendering out of WWT might be desired in the following situations:
- You have a planetarium with its own video playback system.
- You want to combine WWT images and videos with other content. For instance, this could be done to use WWT to render out a star field at a certain time and then composite a horizon or other elements in front of it. Or you might want to render some scenes in WWT and other ones in another package and then splice them together.
- You want to distribute a video to YouTube or create a video for a presentation in PowerPoint.
Simple Case🔗
In the case of a flat screen, things are pretty straightforward. Once a tour your want to render out is loaded, select {Guided Tours > Render to Video . This will open the Render Tour to Video dialog box.
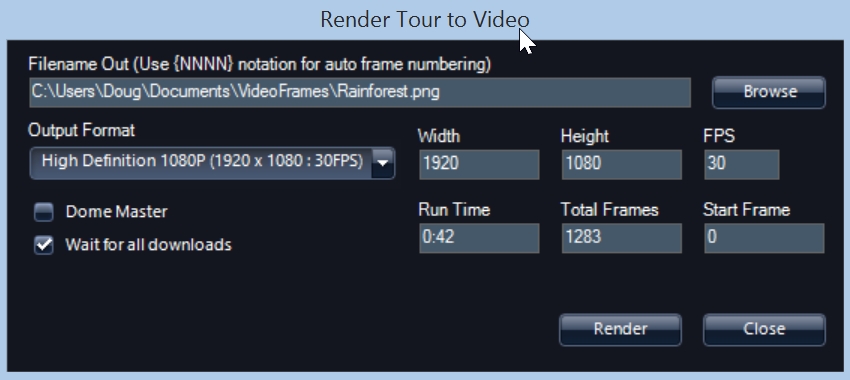
By default the frames are written to the VideoFrames folder under your
Documents. In the dialog box, you just need to specify a filename. WWT will
create a sequence of frames based on that name. If you give the name
C:\Users\Doug\Documents\VideoFrames\Rainforest.png in the dialog box, WWT
will write a sequence of images named Rainforest_0000.png,
Rainforest_0001.png, etc. You should also leave the output extension as PNG.
Don’t change it to anything else or give the name without an extension. WWT
only writes PNG files.
Also, currently for flat (i.e., non-dome) output format is set to the same resolution as the display, so if you are on a 1080×1920 display that will be the output size of the PNG images. For flat screens, don’t change these numbers and WWT only renders out 30 frames per second (FPS).
The Run Time and Total Frames are reported from the Tour. You can adjust the Start Frame number to begin rendering frames to some point into the Tour. This can be useful when you want to render frames in sections or make a change to a part of the tour and render those frames out. Note, there is no way to specify the end frame here, so you will have to watch the progress dialog that reports how much has been rendered and then click Cancel when you want to stop it.
When rendering, we recommend checking the box Wait for all downloads, which will force WWT to wait to load any data, tiled images, 3D terrain, 3D cities needed to render each frame. Unless you just want to make a quick small pre-visualization, the additional amount of time to wait for all data to download is a small price to pay for better rendered output.
Targeting the Dome🔗
To render frames for dome output you have to do the following:
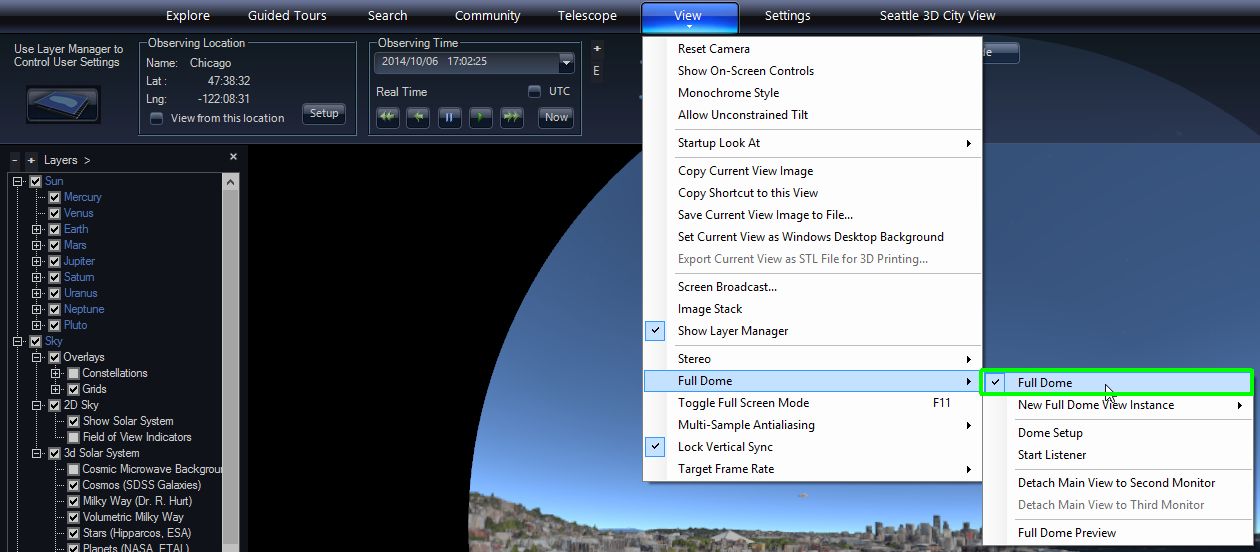
- Make sure you are in Dome view. Select this under View/Full Dome/Full Dome.
- Open the Render Tour to Video dialog box.
- Check the Dome Master check box.
- Check the Wait for all downloads check box.
- In the Output Format pull-down, select one of the Dome Master formats: 1k, 2k, 3k, 4k, or 8k.
- Click Render to write the files.
Note that for large 4k or 8k images, writing each frame may take several seconds.
Making Video from Rendered Frames🔗
Once you have your frames rendered you can make the output into a video. This functionality is not built into WWT, but here are some options of how to proceed.
First make sure the frames look OK and that the frame numbers are contiguous. Be careful if you render parts and try to put them together. If you do that we recommend that you render each part to its own folder and then copy the frames you want into a final folder.
If you want to add audio, you can use the voiceover and music audio files from the tour. Note, that you can include a sequence of audio files associated with each slide, but it may be easier if you combine those files outside the video encoding program and bring in just one audio file for voiceover and one for music.
QuickTime Pro is a relatively inexpensive way to encode the sequence of PNG files into a video.
- Open the PNG images by selecting File/Open Image Sequence… Browse to the name of the first file of the sequence. This will open the sequence in its own window.
- In that new window, select File/Export, which will bring up a dialog box.
- Set the output video file name and options in this box and then click Save.
Adobe Premiere is a more powerful way to encode video.
- Open the PNG images by selecting File/Import and then browsing to the name of the first file of the sequence. Check the Image Sequence box above the file name and click Open .
- In a similar way you can import your audio tracks as well.
- You will see your image sequence and audio if you imported that in the media browser in the lower left panel. Drag the image sequence and audio files into the timeline in the lower right.
- To output the video, select File > Export > Media … . You can change any of the export controls in the dialog box and when you are happy click the Export button.